


Philodendrons are some of the easiest houseplants to propagate, which is part of what makes them so rewarding to grow: one healthy plant can become several for free. For most philodendrons, propagating is as simple as taking a stem cutting with a node and rooting it in water or soil. This guide walks through exactly where to cut, both rooting methods, how long it takes, and the few mistakes that stop cuttings from rooting.
Short answer
To propagate a vining philodendron, cut a stem section that includes at least one node, the bump where roots form, and place it in water or moist soil in bright indirect light. Roots appear in about two to four weeks, and once they are one to two inches long you pot the cutting up. Always include a node, or nothing will root.
If you want the full care routine for the plant you are propagating, my philodendron care guide covers light, watering, and soil, and the best philodendron varieties roundup helps if you are deciding which type to grow on.
What you need to propagate a philodendron
You do not need much to propagate a philodendron, which is part of the appeal. Before you start, gather a healthy parent plant to take a cutting from, a pair of clean, sharp scissors or pruners, and either a clear glass or jar of water or a small pot of moist airy potting mix, depending on which method you choose. Clean tools matter more than anything fancy, since a clean cut lowers the risk of rot and disease.
The most important rule: find the node
Before any cutting, you need to understand the node, because it is the one thing that makes or breaks propagation.
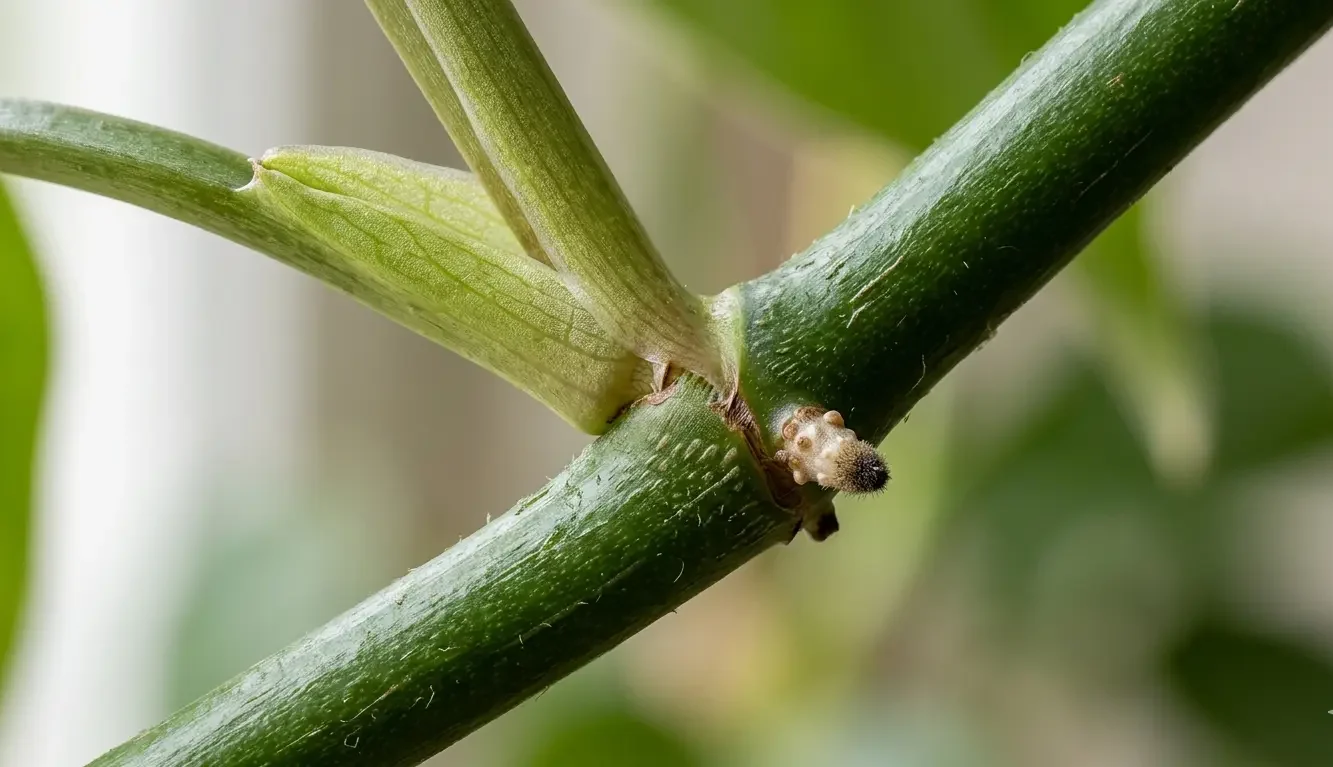
A node is the small bump or band on the stem where leaves, and roots, emerge. It is often where a leaf joins the stem, and on many philodendrons you can see small aerial roots already starting there. Roots can only grow from a node. This is the single most common reason propagation fails: people cut a beautiful leaf with a long stalk but no node, and it simply sits in water for weeks and never roots, because there is nowhere for roots to form. So whatever else you do, make sure every cutting includes at least one node.
How to take a philodendron cutting
Once you can spot a node, taking the cutting takes less than a minute.
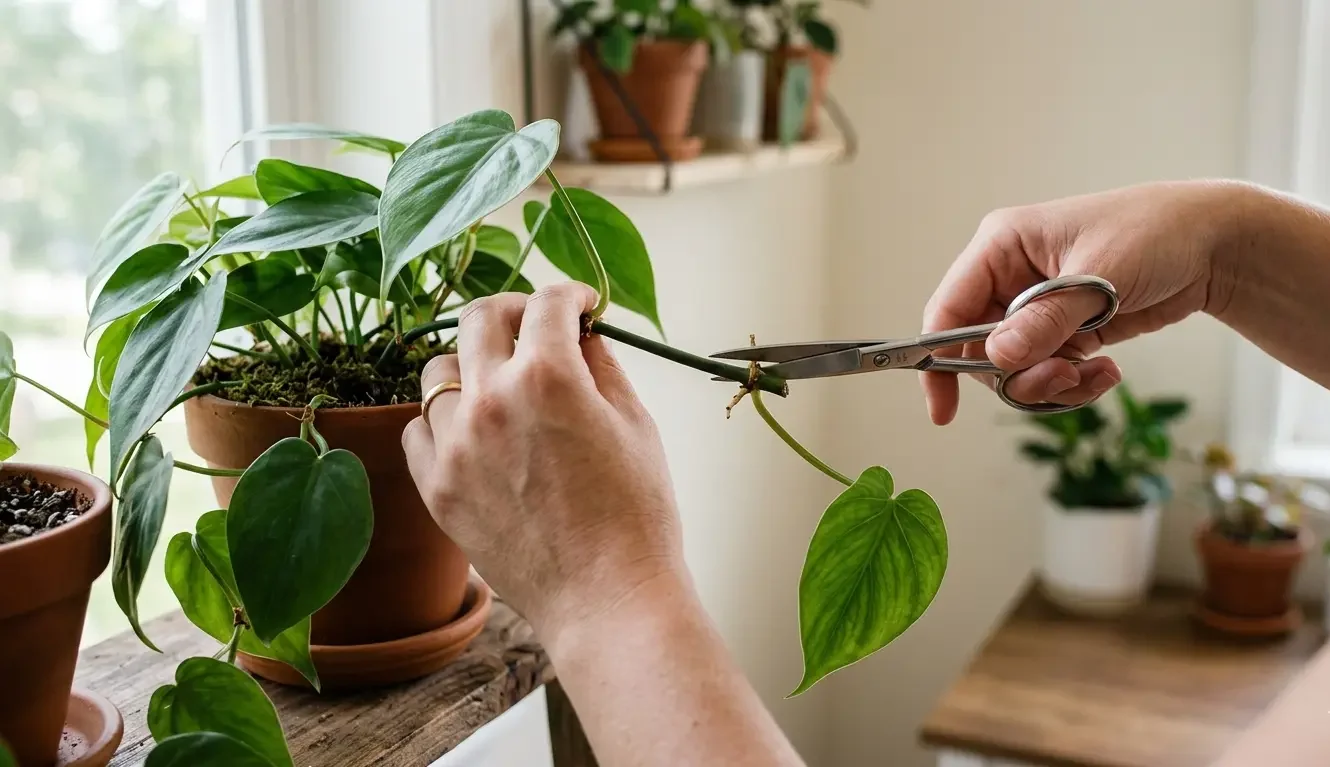
Choose a healthy stem and locate a node, ideally with a leaf or two above it. Using clean, sharp scissors, cut the stem about a centimeter below the node, so the node sits at the bottom of your cutting. A good cutting has one or two nodes and at least one leaf, which gives it the energy to grow while the roots develop. If your cutting has several leaves and is quite long, you can divide it into multiple cuttings, as long as each piece has its own node. Remove any leaf that would sit underwater or be buried in soil, since submerged leaves rot.
Method 1: rooting in water
Water propagation is the most popular method, especially for beginners, because you can watch the roots form and know exactly when the cutting is ready.
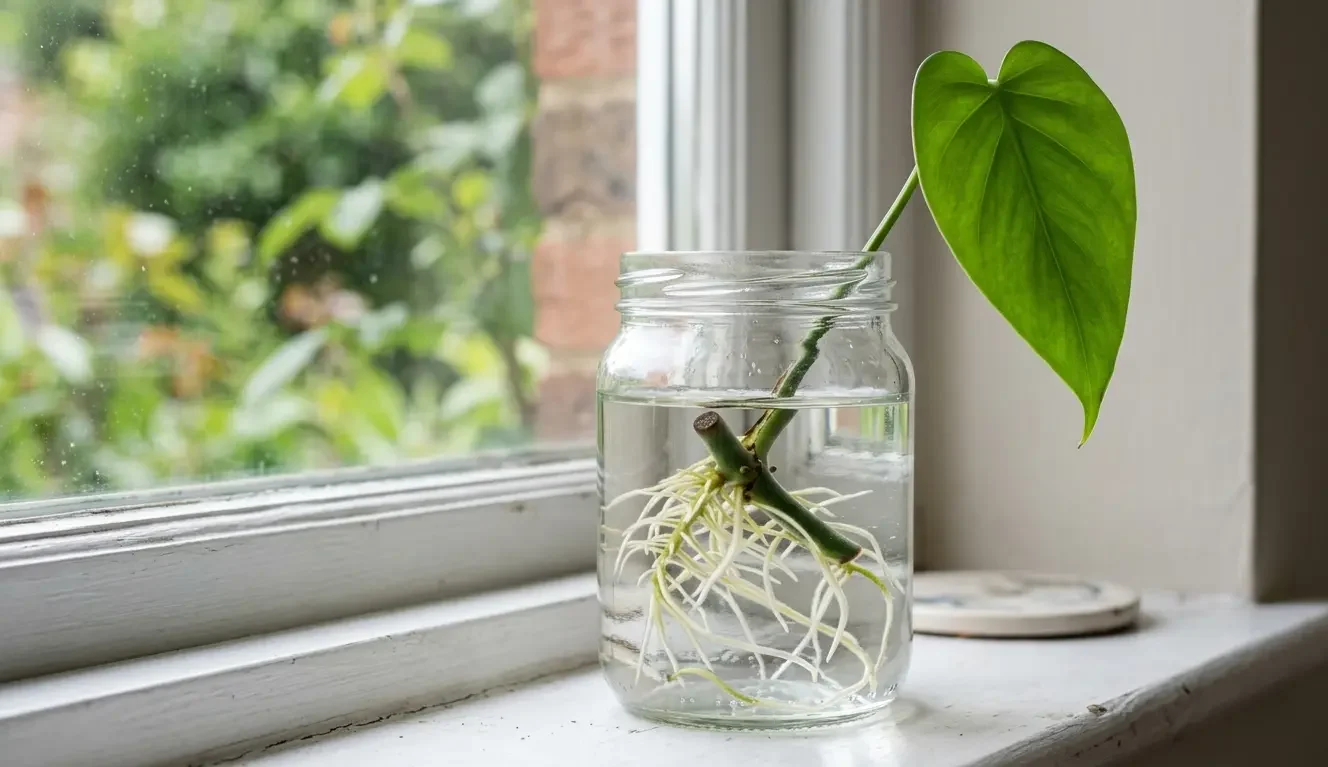
Place the cutting in a clear glass or jar of room-temperature water, with the node fully submerged but the leaves above the waterline. Set it somewhere with bright indirect light, not direct sun, which can overheat the water and cook the cutting. Refresh the water every few days to keep it oxygenated and clean, which prevents the cloudy, smelly water that leads to rot. Within about two to four weeks you should see small white roots emerging from the node. Once those roots are one to two inches long, the cutting is ready to pot up.
Why water propagation is great for beginners
Because you can see everything, water propagation takes the guesswork out. You know the cutting is alive when roots appear, and you know exactly when to pot it. It is the most reassuring way to learn.

Method 2: rooting in soil or moss
Rooting directly in soil or sphagnum moss skips the transplant step and tends to produce sturdier roots that adapt to soil from the start.
Take your cutting the same way, then plant the node into a small pot of moist, airy potting mix or moist sphagnum moss, with the node buried and the leaves above the surface. Keep the medium lightly moist but never soggy, and set the pot in bright indirect light. Some growers cover the pot loosely with a clear bag to hold humidity, which can speed rooting, but open it regularly so it does not get stale and moldy. Soil rooting is a little less reassuring than water because you cannot see the roots, so resist the urge to tug the cutting; a gentle, slight resistance after a few weeks tells you roots have formed.
Method 3: propagating self heading types
Not every philodendron is a vine, and the self heading types are propagated differently.
Compact, self heading philodendrons like the Birkina and Prince of Orange grow as an upright clump rather than a trailing vine, so they rarely offer the long stem sections that vining types do. Instead, you propagate them by division: at repotting time, look for a natural offset or a section of the plant that has its own roots, and gently separate it into its own pot. This is a bit more involved than a simple cutting, but it is the reliable way to multiply a self heading plant.
How to pot up your rooted cutting
Once your cutting has roots one to two inches long, it is ready for a pot.
Choose a small pot with drainage holes, only a little larger than the root system, and use a loose, airy aroid mix, about 2 parts potting soil, 1 part orchid bark, and 1 part perlite. Settle the cutting in so the roots are covered and the stem sits at the surface, then water it in. Water cuttings sometimes sulk for a week or two as they adjust from water to soil, which is normal, just keep the soil lightly moist while they settle. After that, care for the new plant exactly as you would the parent.
[ IMAGE NEEDED: propagate-philodendron-potting.jpg ] PROMPT (Nano Banana): Hands potting a rooted philodendron cutting with white roots into a small pot of fresh soil, indoor setting. Photorealistic, clean neutral background, soft natural light, high detail, no text, no watermark, sharp focus. File name: propagate-philodendron-potting.jpg Alt text: Potting up a rooted philodendron cutting into soil Title: Potting up a rooted cutting Caption: Pot up once the roots are one to two inches long. (Generate, save under the file name above, then delete this block before publishing)
When is the best time to propagate?
Timing affects how fast your cutting roots.
The best time to propagate a philodendron is spring and summer, during the active growing season, when cuttings root fastest and the parent plant recovers quickly from being cut. You can propagate in autumn and winter too, but rooting is slower because the plant is resting, so be patient and keep the cutting warm and in good light.
Common propagation mistakes and how to avoid them
Most failed cuttings come down to a handful of avoidable mistakes.
My cutting has no node
This is the number one reason cuttings fail. A leaf and stalk with no node cannot grow roots. Always check that your cutting includes at least one node before you put it in water or soil.
The cutting is rotting instead of rooting
Rot usually means stale water, a submerged leaf, or soggy soil. Refresh the water every few days, keep all leaves above the waterline or soil surface, and never let soil stay waterlogged.
Nothing is happening after weeks
Slow or stalled rooting usually means too little light or cold conditions. Move the cutting to bright indirect light and somewhere warm, and avoid propagating in a cold room in winter.
The roots formed but the cutting wilted after potting
This is transplant shock, common when moving from water to soil. Keep the soil lightly moist and the plant in bright indirect light, and it usually recovers within a couple of weeks as it grows soil-adapted roots.
Putting it all together
Propagating a philodendron really comes down to one rule and a little patience: include a node, keep the cutting in bright indirect light, and either water or soil will do the rest. Within a month you usually have a rooted new plant, and from there it is just regular philodendron care. It is one of the most satisfying things you can do with these plants, and a free way to grow your collection or share cuttings with friends.
Which philodendron are you propagating, and are you trying water or soil? Leave a comment below and I will help if your cutting is being stubborn.
Frequently asked questions
How do you propagate a philodendron for beginners?
Take a stem cutting with at least one node, the bump where roots form, place it in a jar of water in bright indirect light, and refresh the water every few days. Roots appear in a couple of weeks, then you pot it up. It is one of the easiest plants to propagate.
How long does it take for philodendron cuttings to root?
Usually about two to four weeks in water for vining types, sometimes faster in warm, bright conditions. Pot the cutting up once the roots are one to two inches long.
Can you propagate a philodendron without a node?
No. A cutting must include at least one node, the small bump on the stem where leaves and roots emerge, because roots can only form there. A leaf with no node will not grow into a new plant.
Is it better to propagate philodendron in water or soil?
Water is easier for beginners because you can watch the roots form, while soil skips the transplant step and grows sturdier roots. Both work well for vining philodendrons, so it comes down to preference.
When is the best time to propagate a philodendron?
Spring and summer, during the active growing season, when cuttings root fastest. You can propagate in autumn and winter too, but expect slower rooting.
Why is my philodendron cutting not rooting?
The most common reasons are no node included in the cutting, not enough light, or cold conditions. Make sure the cutting has a node, keep it in bright indirect light and warmth, and refresh the water regularly.
Can you propagate a self heading philodendron like a Birkin?
Yes, but it is different from vining types. Self heading philodendrons are usually propagated by division or by removing a rooted offset, rather than by simple stem cuttings, since they grow as a clump instead of a vine.
